
Buttons Overview:

![]() – Import BD/DVD from BD/DVD ROM
– Import BD/DVD from BD/DVD ROM
![]() – Import BD/DVD from BD/DVD from a folder
– Import BD/DVD from BD/DVD from a folder
![]() – Open a *.IFO or DVD *.ISO file
– Open a *.IFO or DVD *.ISO file
![]() – Edit selected task
– Edit selected task
![]() – Set update settings and storage place and file format for snapshot images.
– Set update settings and storage place and file format for snapshot images.
Import Blu-ray/DVD
You can click “BD/DVD Disc” icon, or “BD/DVD Folder” icon to import Blu-ray and DVD source movie or click “IFO/ISO” icon to import DVD files.
a. Title Mode
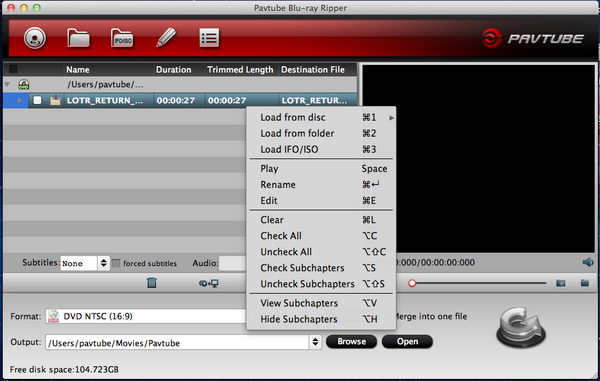
The BD/DVD contents are listed in Title Mode with “Main Title” marked out and selected by default. In General, the Main Title contains the main movie, and other Titles are commentary, menus, ads, etc. If you would like to preserve everything in the Blu-ray/DVD Disc, simply right click on the main title to “Check All”.
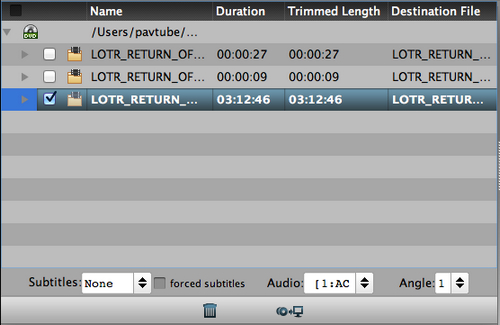
b. File Mode
Click “Title Mode” if you’d like to switch to “File Mode”. In “File Mode” the movie clips are listed as they are made of. And you can check and preview each file at will.
Tip: In “File Mode” all the m2ts files in file list are checked by default. If you want to select but the main movie, a fast way is to right-click and choose ‘Uncheck All’ in shortcut menu and then check the main movie (usually the longest m2ts file).
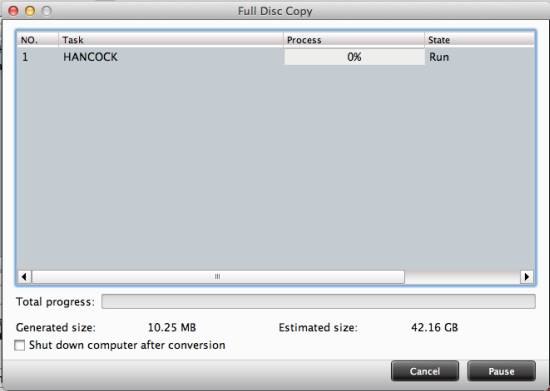
c. Full Disc Copy
To make a quick and full copy of the Blu-ray movie, you can use “Full Disc Copy” option. In this way all contents in the Blu-ray Disc will be copied to your hard drive without quality loss, including all audio tracks, subtitles, and videos. After the copying process completed, you can click “Open” button to get the output Blu-ray directory. Open BDMV-> STREAM folder and you will find all the m2ts movie clips.
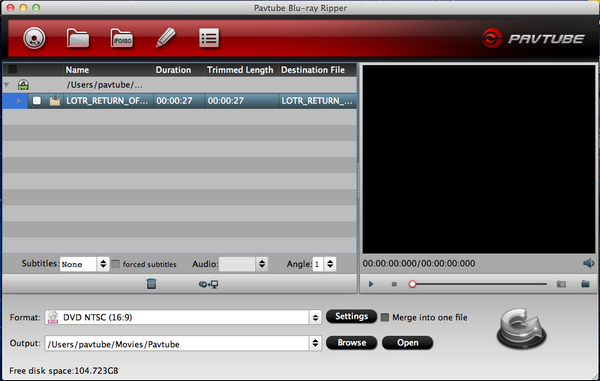
d. File list labels
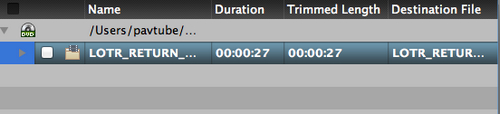
Name: the name for each title or chapter
Duration: the original length of each file before conversion
Trimmed Length: the length of each file after trimming
Destination File: the name of the converted file
e. The Preview Window
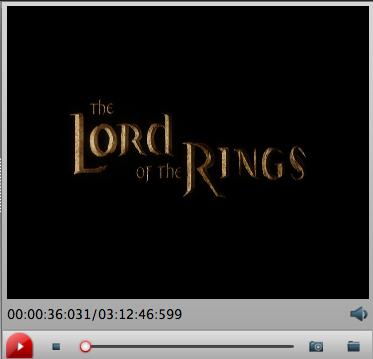
Play button ![]() – Pause or play the video.
– Pause or play the video.
Snapshot button![]() – Snapshot the pictures and save them on your computer.
– Snapshot the pictures and save them on your computer.
Stop button![]() – Stop playing.
– Stop playing.
Open button ![]() – Open the snapshots folder.
– Open the snapshots folder.
f. Subtitles and Audio

Always select the title/chapter before setting its subtitles and audio. In the preview window you can check the Subtitles and Audio track. By default no subtitles are selected. Some chapters/titles have no subtitles; in that case the Subtitles list will show ‘None’ only.
In addition, Pavtube Blu-ray Ripper for Mac also offers an option called “Only show forced subtitles”, which enables you to see subtitles only when actors are speaking a different language. For instance, if you specify English (your mother tongue) as your subtitles, and meanwhile tick off “Only show force subtitles” option, then when actors are speaking English, no subtitles will show up, but when they are talking with each other in French, the English subtitle will appear accompanying with the French.
Customize Settings
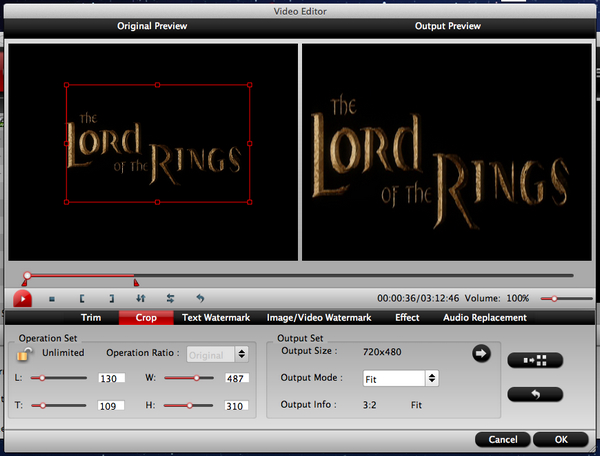
You can click ![]() to edit the video contents before processing Blu-ray/DVD ripping. There are six functions available: Trim, Crop, Text Watermark, Image/Video Watermark, Effect, and Audio Replace.
to edit the video contents before processing Blu-ray/DVD ripping. There are six functions available: Trim, Crop, Text Watermark, Image/Video Watermark, Effect, and Audio Replace.
![]()
Trim: Select video durations by setting the start time and the end time.
Crop: Cut off black edges and unwanted areas.
Text Watermarking: Add text to the video as watermarks.
Image/Video Watermarking: Add image or video to the source video as a watermark.
Effect: Adjust brightness, contrast, saturation of the video, and add special effects to the video.
Replace audio track: Take place of the original audio track with your specified sound track.
Trim Video
By using trim function, you can select your favorite video clips to convert at will.

| Start Time | Set it by modifying manually or dragging the adjustment slider to choose your favorite start time. |
| End Time | Select the end time by modifying manually or dragging the adjustment slider to choose your favorite ending. |
| Length | Show the selected length of the video. |
Crop Video
By using crop function, you are able to cut off black edges as well as any unwanted areas of the source video. The “Output Preview” window will show you the final effect of your modification, so you can change your adjustment in real time.
Add Text Watermark
Under “Text Watermark” tab, tick off “Enable” option, and then you can type your wanted texts as watermark.

1. Check option “Enable” to edit text watermark.
2. Type the text you want to use as watermark in text watermark area.
3. You can add “Strikeout” and “Underline” effects to the text watermark by ticking off “Strikeout” and “Underline” option.
4. Drag the slider bar of “Transparence” to adjust transparence.
5. Customize “Font”, “Color”, “Size”, and “Style” of the text.
6. Drag the slider bars of “Left”, “Top” to adjust the location of the text watermark.
Add Image/Video Watermark
Click “Image/Video Watermark” button to come into the image/video watermark editing window to realize a picture-in-picture effect.
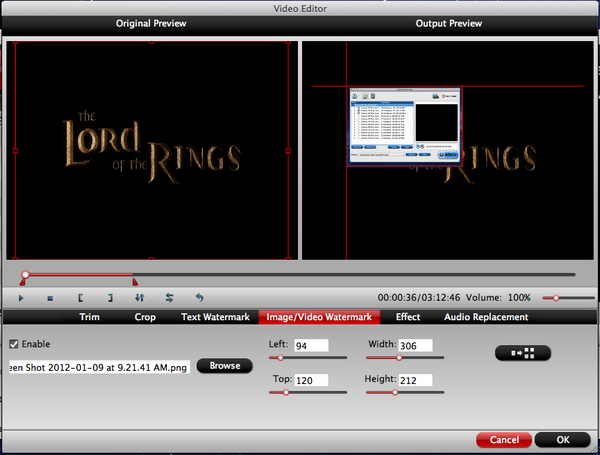
1. Check option “Enable” to edit image or video watermark.
2. Click “Browse” button to select the image or video file you want to use.
3. Set the image/video position by dragging the slider bars of “Left” and “Top”
4. Resize the height and width of the image/video by dragging the slider bars of “Width” and “Height”.
Effect
Under “Effect” tab, you can adjust the effects by adjusting the following parameters:
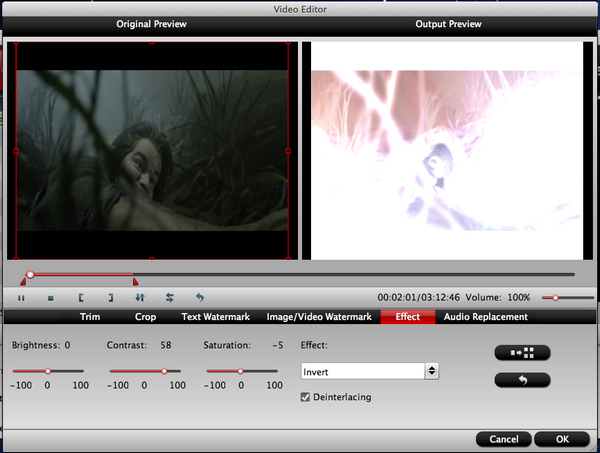
Brightness: Drag the slider bar of “Brightness” to adjust the brightness of the image/video.
Contrast: Drag the slider bar of “Contrast” to adjust the contrast of the image/video.
Saturation: Drag the slider bar of “Saturation” to adjust the saturation of the image/video.
Volume: Drag the slider bar of “Volume” to adjust the volume of the audio.
Deinterlacing: If there are some stripes on the picture, you can check this option to make a better picture effect. (Checked by default)
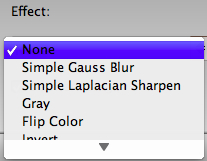
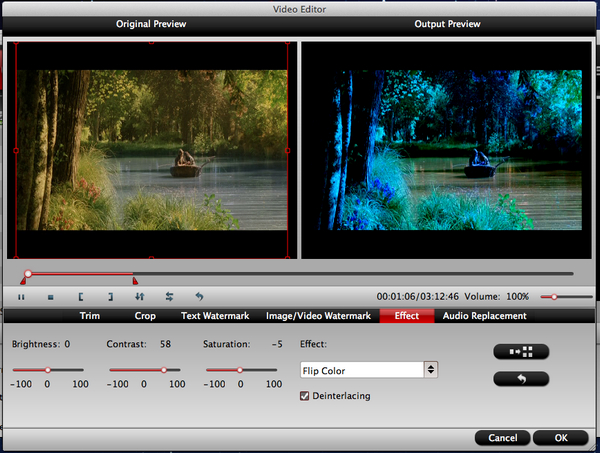
Effect: Choose a special effect from the Effect drop-down list. There are many available choices including Simple gauss blur, Simple laplacian sharpen, Aged film, Flip color, Invert and None.
Following interface shows the effect of “Flip Color”:
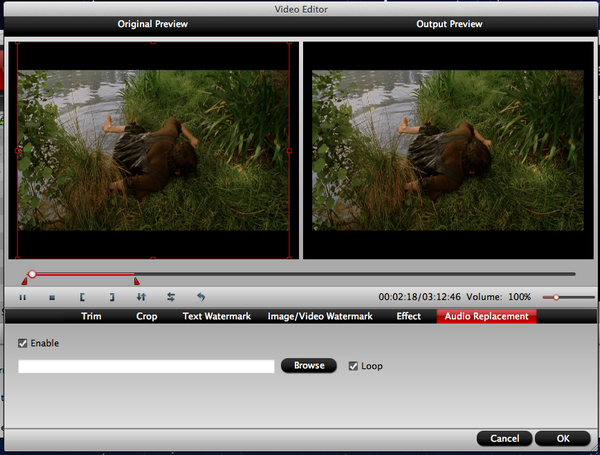
Audio Replace
Under “Audio Replace” tab, check “Enable” option, and hit the “Browse” button to select the audio file you want to use as audio track. The “Loop” option is checked by default, if you needn’t loop, just remove the checkmark.
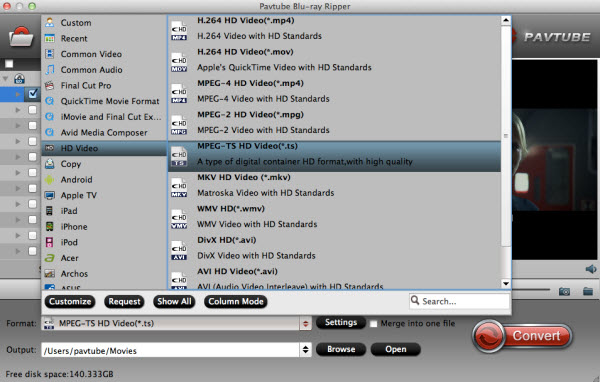
Set Output Settings
Choose the Output File Format and Storage Path:
The program allows you to set the output file format and the storage path. Choose the output file format from the list of “Format”. If you only want to backup the DVD movie to your hard disc with original structure, you can directly use “Full Disc Copy” function.

At the same time, click the button ![]() to specify a destination folder for the final output files.
to specify a destination folder for the final output files.
Advanced Setting:
Click ![]() button to adjust video and audio parameters.
button to adjust video and audio parameters.
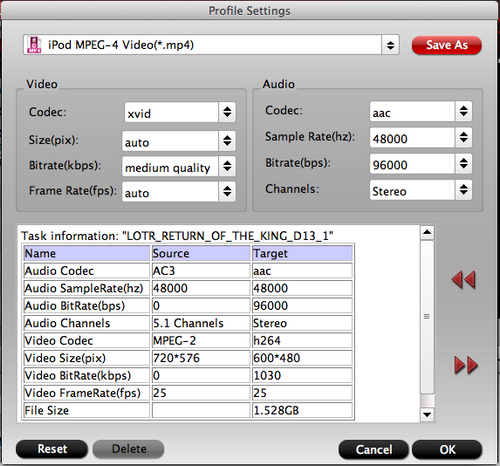
Format: You can also choose output format here on “Profile Settings” panel.
Save As: Click “Save As” to save the profile. Meanwhile you are allowed to give a name to the profile by yourself. Then you could directly find this format profile under “Custom” menu when selecting format in the main interface of this program.
Video: You can customize the video performance through adjusting codec, size, bit rate, and frame rate.
Audio: You can customize the audio performance by resetting codec, sample rate, bit rate, and audio channels.
Option
General Option
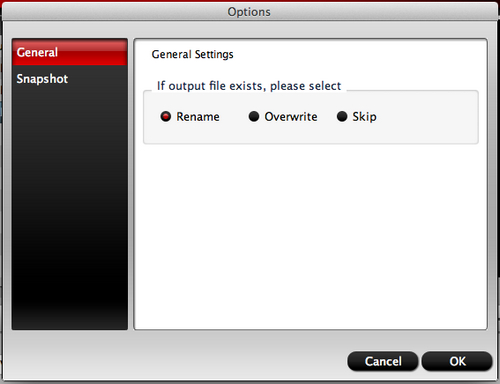
1. File Exists Action – Rename, Overwrite or Skip when the output file shares the same name with an existing file in the output folder.
Rename: Select “Rename” to generate a new name for present output file to avoid overwriting the existing file. The automatically generated name is formed with the existing name and orderly number.
Overwrite: Select “Overwrite” to replace existing file with present output file.
Skip: Select “Skip” to cancel converting output file that shares the same name with an existing file in the output folder.
2. Update Settings
You can choose “Auto Update”, “Manual Update” or “Update Every * Days” as update settings.
Thumbnail Option
Choose Output Folder: Click “Browse” button to choose the output folder for snapshot images.
Choose Format: Select output format for snapshot images.
Note: The option settings will be preserved and recur as default settings automatically at next run.
Convert Movie
Click the big button “Convert” to start Blu-ray/DVD conversion. Once beginning, you will see the conversion window below:
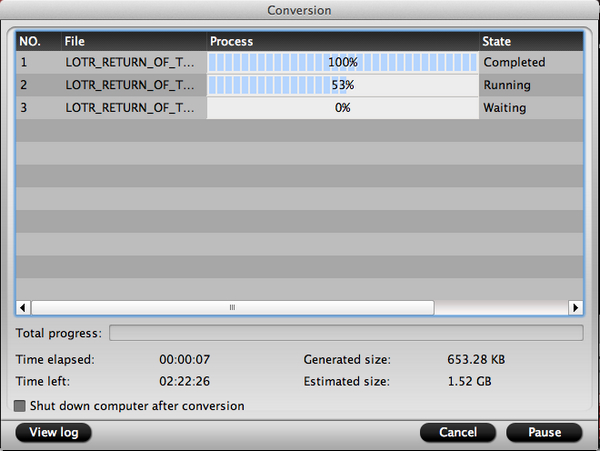
To avoid waiting around for the ripping process, you can tick off the checkbox “Shut down computer after conversion”.
Click here to order your copy of Pavtube Blu-ray Ripper for Mac NOW!